

How Clean Black Lines Canon Pc11 Copier
If the copy is spotted or dirty, clean the scanning components and machine'south interior.
Keep the scanning area make clean to avert dirty copies or faxes to exist sent.
Platen glass
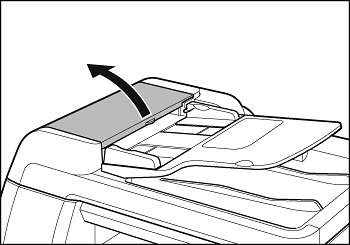
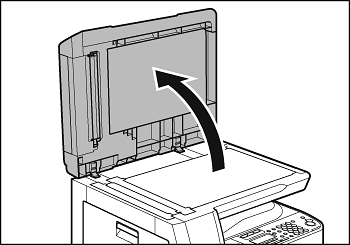
1. Open the ADF.

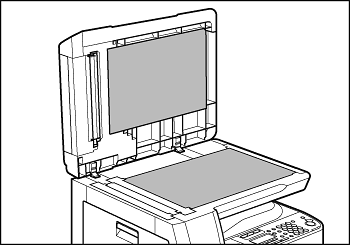
2. Clean the platen glass and the underside of the ADF with a material dampened with water. Then wipe the area with a soft, dry out textile.

annotation:
Practise not dampen the material as well much, as this may tear the document or damage the auto.
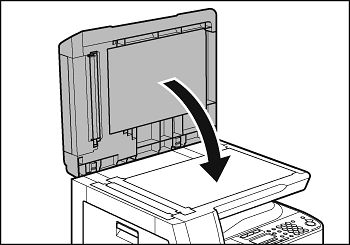
3. Shut the ADF.

attending:
Be conscientious not to get your fingers caught.
ADF (Cleaning the ADF Manually)
If your documents have black streaks or appear dirty after copying them using the ADF, this may exist caused by pencil pb rubbing off the documents and onto the roller. Clean the ADF scanning expanse, pic, and roller.
1. Turn off the principal ability switch and disconnect the ability cord.
2. Open the ADF cover.
3. Clean the rollers (A) within the ADF with a fabric dampened with water. Then wipe the area with a soft, dry material.

note:
Do not dampen the cloth as well much, as this may tear the document or harm the machine.
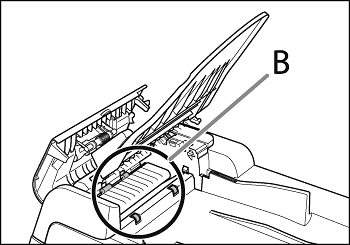
four. Lift the document feeder tray.
5. Clean the rollers (B) below the document feeder tray with a fabric dampened with h2o. Then wipe the expanse with a soft, dry textile.
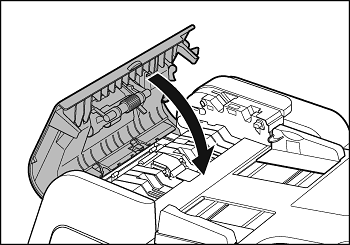
6. Lower the certificate feeder tray.

attention:
Be careful not to get your fingers defenseless.
7. Shut the ADF cover.
attention:
Be conscientious not to get your fingers defenseless.
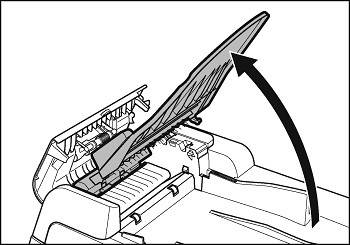
eight. Open the ADF.
nine. Clean the ADF scanning area (on the left side of the platen drinking glass) and the document feeding roller with a fabric dampened with water. And so wipe the expanse with a soft, dry out cloth.
10. Close the ADF.
attention:
Be careful not to get your fingers caught.
11. Reconnect the power string and turn on the main ability switch.
Cleaning the ADF Automatically
If your documents take black streaks or appear dirty later scanning them through the ADF, clean the ADF roller by repeatedly feeding bare sheets of paper through it.
1. Press [Additional Functions].
two. Printing [<-] or [+>] to select <Suit./CLEANING>, so printing [OK].
3. Press [<-] or [+>] to select <FEEDER CLEANING>, then press [OK].
4. Load v sheets of blank paper into the ADF, and then press [OK].
ADF cleaning starts. When finished, the display returns to the standby mode.
Clean the auto'due south print area periodically to forestall toner pulverization and paper grit from accumulating inside.
ane. Turn off the main power switch and disconnect the power cord.
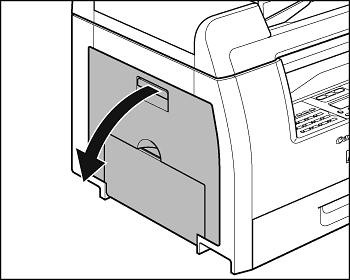
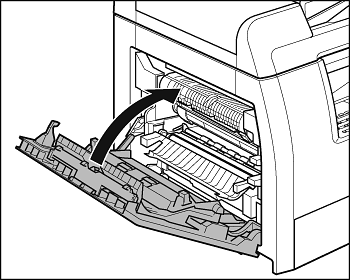
2. Open up the left encompass.
3. Grasp the blue plastic pull tab (A) on the toner cartridge. 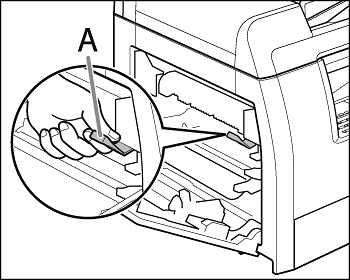
attention:
Exercise not touch the rollers and parts which take labels "CAUTION! Hot surface avoid contact" on. They become very hot during use.
4. Pull the blue plastic pull tab until you tin easily concord the handle of the toner cartridge. 
5. Remove the toner cartridge.
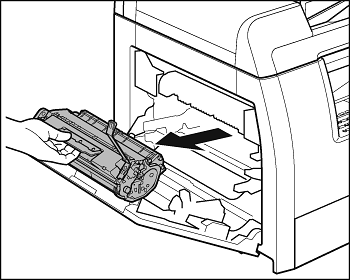
attending:
- Always agree the toner cartridge by its handle.
- To avert exposing the toner cartridge to light, place information technology in its protective bag or wrap information technology in a thick material.
- Do not open the drum protective shutter on the toner cartridge. Print quality may deteriorate if the pulsate surface is exposed to light or is damaged.
6. Use a clean, soft, dry, lint-free cloth to remove any toner or paper debris from the machine'south interior.

attention:
- Do not bear upon the fixing assembly (A) equally it becomes very hot during use.
- Do not affect the transfer roller (B) as this can impairment the machine.
- If loose toner comes into contact with your skin or clothing, wash with common cold water. Warm water will set up the toner.
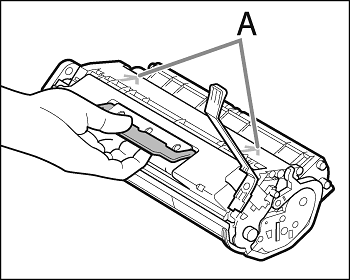
7. Hold the toner cartridge by its handle.
The arrows (A) on the toner cartridge should be pointing toward the auto.
8. Insert the toner cartridge into the machine as far as it will go.
The left border (A) and the right side protrusions (B, C) of the toner cartridge should exist aligned with on the guides inside the machine.
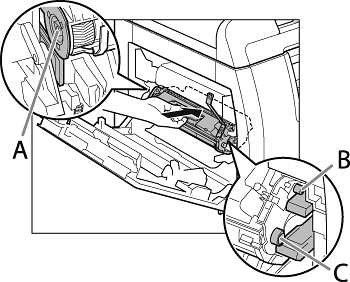
9. Push the toner cartridge to make certain it is properly set in the auto. 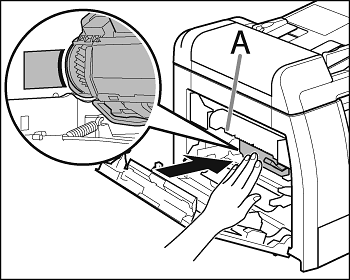
attention:
Practice not touch the fixing assembly (A) as information technology becomes very hot during employ.
10. Close the left cover.
attention:
- Be careful non to get your fingers caught.
- If you lot cannot close the left comprehend, practice non force information technology to close. Open the cover and make sure the toner cartridge is properly set in the automobile.
11. Reconnect the power cord and plough on the main ability switch.

Source: https://support.usa.canon.com/kb/index?page=content&id=ART102469
Posted by: hobbsfamenig.blogspot.com
0 Response to "How Clean Black Lines Canon Pc11 Copier"
Post a Comment